Cat6 Cable Installation: A Business Owner's Practical Guide

You don't need another generic cabling quote. You need a cat6 cable installation that works in a real building, with old brick, ugly pathways, and no second chance on Monday morning. In a converted Greenwood office or a downtown Indy suite, the difference between a clean job and a six-month headache is almost always the planning, not the punch-down.
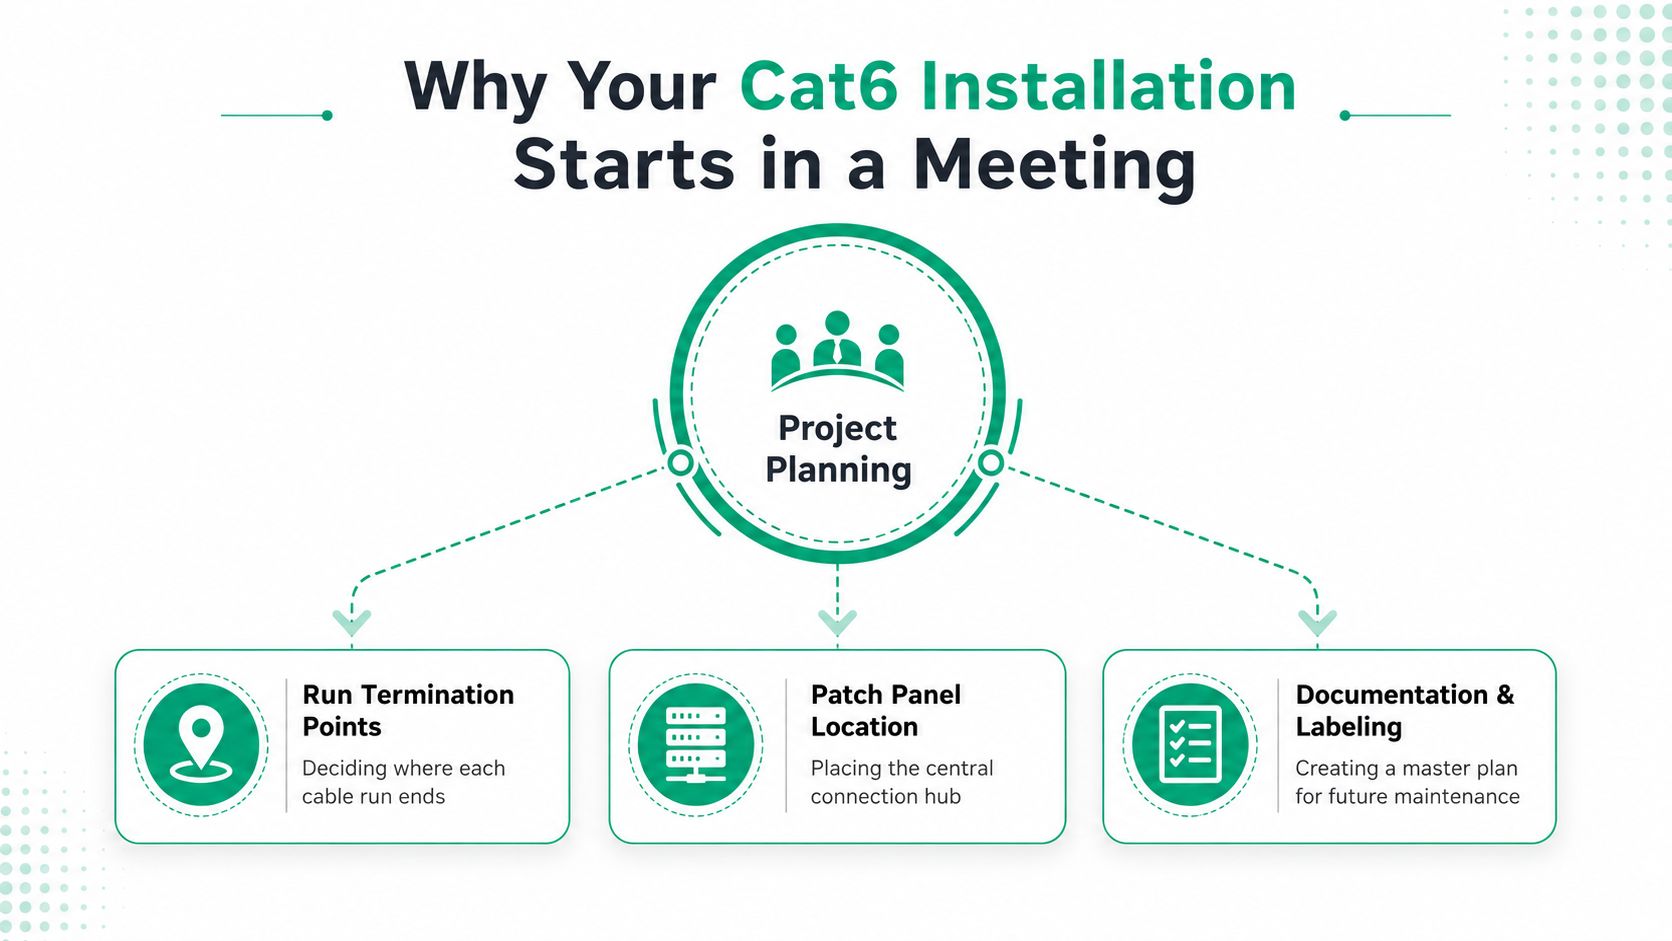
Why Your Cat6 Cable Installation Starts in a Meeting, Not on a Ladder
A Johnson County business owner walks into a renovated space, sees fresh paint, and assumes the wiring will be straightforward. Then the ceiling opens up, the old brick starts fighting every route, and there's no true telecom room to land the cables. That's the point where a lot of projects start costing more time than the hardware ever did.
The first question is where every run terminates. The professional answer is a single central location, with keystone jacks and a patch panel, not a scatter of wall plates and random plugs. That central landing point makes the install serviceable later, which matters when a manager needs one dead desk fixed before a shift change.
The second question is how the runs are built. A proper structured cabling layout uses home runs back to one hub, not daisy-chained shortcuts that create troubleshooting mess later. The planning logic fits what business network setup looks like for Indy SMBs, because the network only stays manageable when every cable has a documented destination.
Practical rule: if the building doesn't have a clean central landing zone, the job isn't “just wiring,” it's a layout decision.
The third question is what the building will fight back with. Older Central Indiana spaces bring plaster, brick, fire blocks, tight chases, and weird retrofits that don't care about your Monday deadline. In that setting, Cat6 is still the sane default for most office drops, because it gives the bandwidth most desks, printers, VoIP phones, and access points need without forcing the cost and stiffness of Cat6A everywhere.
That balance matters in the I-65 corridor, where owners usually want predictable uptime more than shiny overbuild. Most organizations don't need every horizontal drop to behave like a backbone run. They need a network that's neat, documented, and easy to expand without tearing up the ceiling again.
Tools, Materials, and the Stuff You'll Wish You'd Ordered
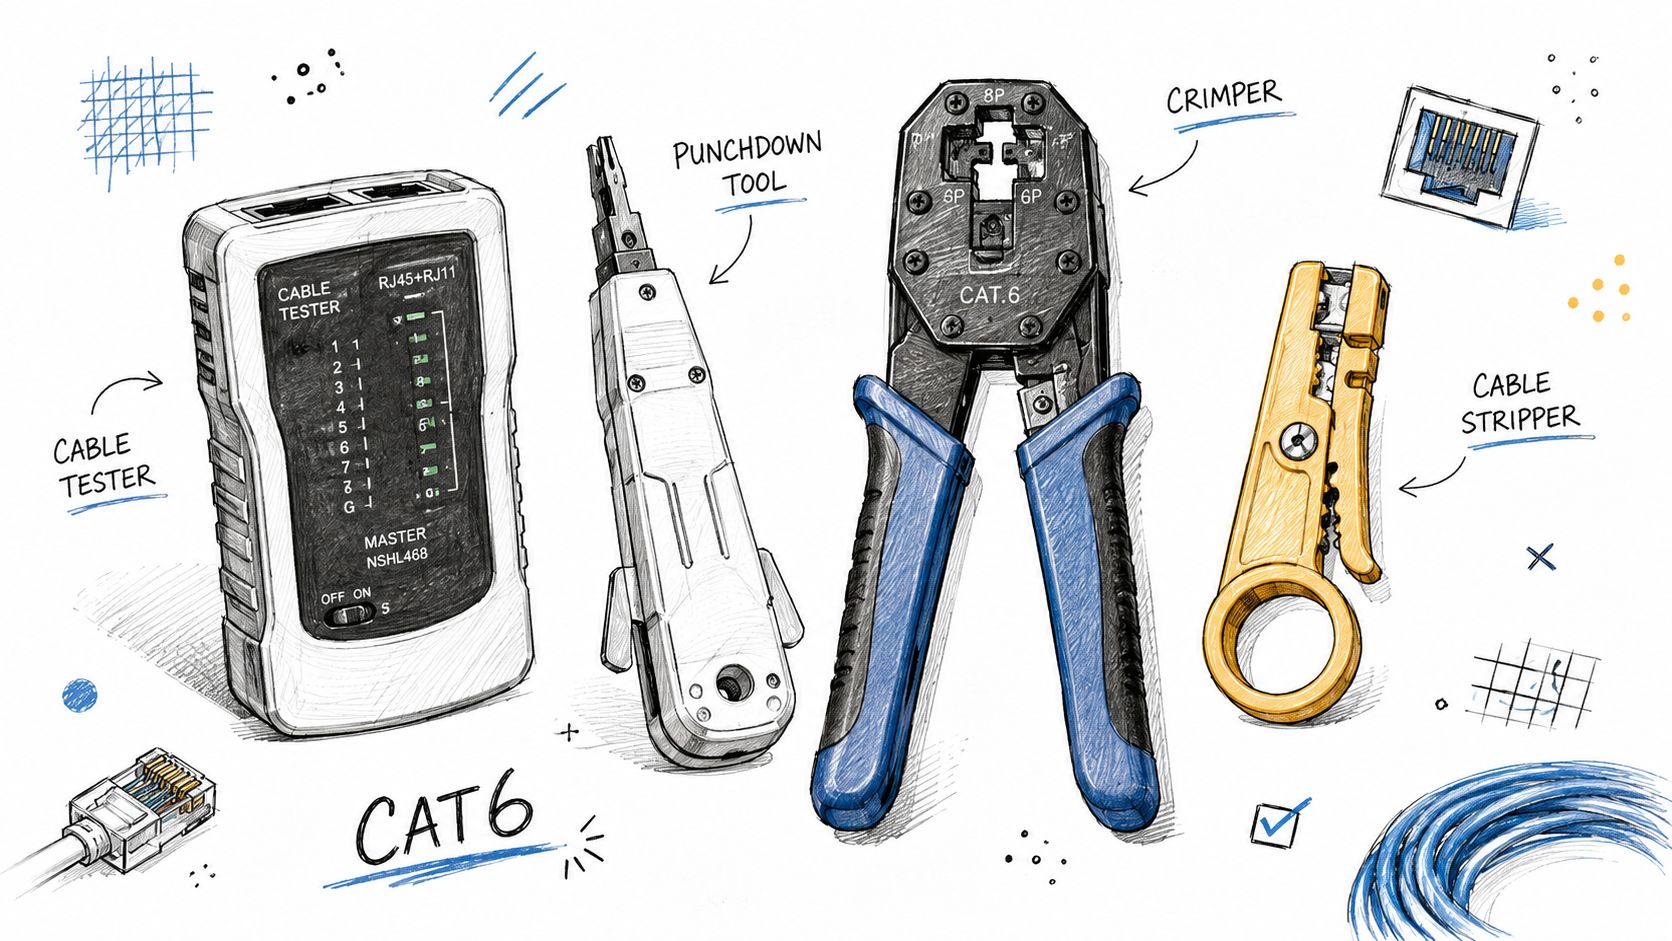
Before a single cable comes out of the box, the shopping list needs to be real. A proper cat6 cable installation uses the right tools for each task, and the tools that save the most time are usually the boring ones. A cable tester, punchdown tool, crimper, cable stripper, label printer, fish tape, drywall saw, stud finder, velcro ties, and J-hooks cover the work that shows up on site.
For in-wall runs, the cable choice is simple. Use solid bare copper for permanent paths and stranded for patch cords. That's not marketing language, that's field reality, because solid cable belongs in the wall and stranded cable belongs where it gets moved.
The jacket rating matters too. CMR is the usual answer for riser and in-wall paths, while CMP belongs in plenum spaces where air handling changes the fire rules. If you're unsure whether a ceiling void counts as plenum space, treat it as a plenum until proven otherwise.
- Cable Tester: Confirms wiring order before the wall gets closed.
- Punchdown Tool: Seats conductors into keystone jacks and patch panels cleanly.
- Crimper: Useful for patch cords, not the foundation of permanent in-wall runs.
- Fish Tape: Pulls cable through finished walls and tight chases.
- Label Printer: Keeps every drop identifiable when somebody moves desks later.
- Velcro Ties: Hold bundles without crushing the jacket.
The forgotten items hurt the most. Keystone jacks, surface mount boxes, a spare spool of cable, and a couple of extra patch panel ports save a Saturday from turning into a supply run. If you want a broader parts list that lines up with the rest of the Indiana market, the Indiana business cable guide is a useful companion reference.
I also tell owners to think about the route like a carpenter thinks about flashing. A good external reference is the XTREME EDEALS INC. flashing guide, because both jobs reward careful prep, seal points, and a clean finish more than rushed labor.
Pulling and Routing Cable the Way Installers Actually Do It
Cable pulling is where theory meets the building. The cable doesn't care how nice the bid looked, it cares about bend radius, support, and what's in the way. In older commercial spaces around Indianapolis, the route often decides the job more than the equipment list does.
Start with separation from power. Keep telecom cabling at least 5 inches from power lines as one installation guide recommends, and use loose Velcro rather than tight zip ties so the bundle isn't crushed. Unsupported cable should be held every 4 feet if it's not in tray, because sagging runs turn into strain points and troubleshooting later.
The bend rule is just as unforgiving. Maintain about four times the cable diameter, which works out to roughly 1 inch for typical Cat6 jacket sizes. That keeps the twisted pairs from getting distorted, and distorted pairs are where later noise and crosstalk headaches start.
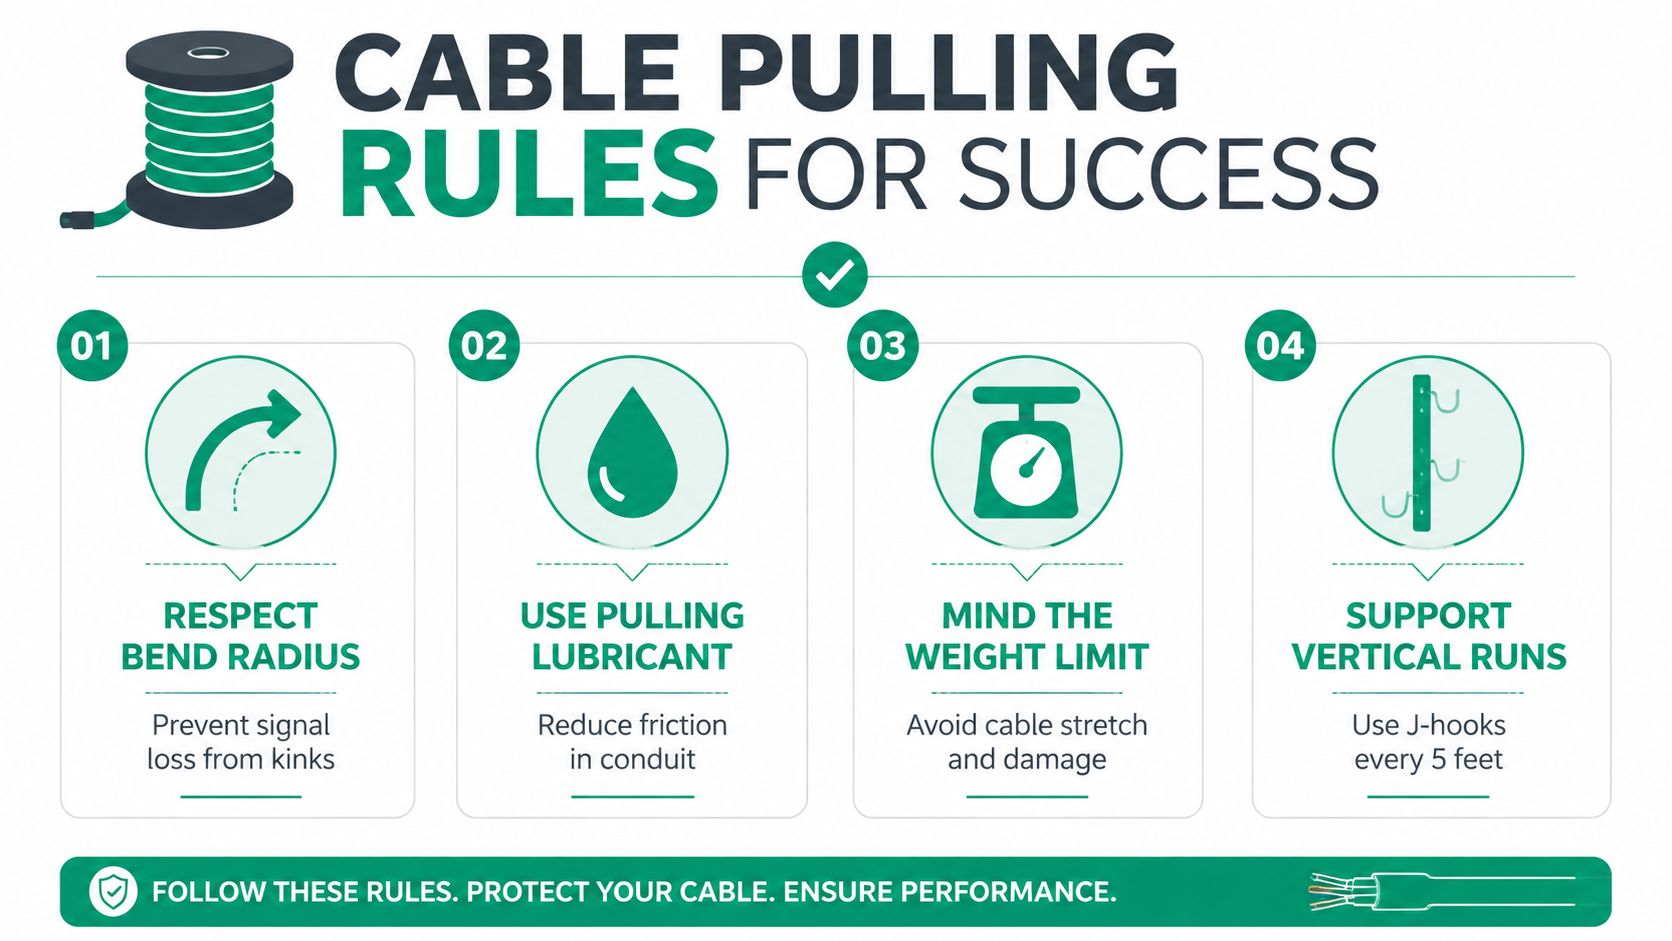
A clean route usually uses J-hooks or cable tray, depending on the building. Tray makes sense in open commercial spaces, while J-hooks are handy where the route is shorter and the ceiling is a little less cooperative. If the cable has to cross fluorescent ballast runs or HVAC ductwork, the route should be adjusted rather than forced, because heat and interference are cheaper to avoid than to diagnose later.
Foreman check: if the path requires a hard bend, a tight bundle, and a bad ceiling move all in one run, stop and re-route before the first pull.
Finished-wall fishing is slower. Plaster, fire blocking, metal studs, and old remodel layers all punish shortcuts. That's why we keep a route plan and a label plan together, as noted in the Indiana cable management playbook, instead of treating cable handling as a last-minute task.
Terminating Cat6 Without Wrecking the Twist
Termination is where clean work becomes visible. It's also where most first-timers get sloppy, usually by untwisting too much or trying to make a permanent link behave like a patch cord. The professional move is straightforward, use keystone jacks on a patch panel, then short factory patch cords to the switch.
That choice beats crimped RJ45 plugs on in-wall solid cable almost every time. RJ45 plugs belong on patch leads and device cords, not on the backbone of the install. The reason is serviceability, strain relief, and the fact that solid wire doesn't stay happy in a plug that gets moved, bumped, or reterminated repeatedly.
Pick one wiring standard and stick to it
Use either T568A or T568B, but use the same standard everywhere on the project. Mixed standards create confusion that looks like a random failure, even when the link is only miswired. In most U.S. installs, T568B is the common choice, so consistency usually wins over arguing about theory.
The physical steps are basic, but the discipline isn't.
- Strip only enough jacket to work cleanly.
- Keep the factory twists tight right up to the jack.
- Don't untwist more than 0.5 inches.
- Seat each conductor firmly into the correct slot.
- Trim flush and snap the jack into place.
The downtime-safe splicing guide is useful reading when a project has to stay live during changes, but the bigger rule is simple. Permanent cabling should be terminated once, neatly, and documented so the next technician isn't guessing.
The part people rush
A jack that looks good from two feet away can still fail under test if one conductor wasn't fully punched down. That's why I watch for the split second when the blade cuts cleanly and the wires seat evenly. A sloppy terminations job wastes more time in follow-up than it saves during install.
Testing, Certification, and Knowing the Job Is Actually Done
A cable is not finished just because it disappears into the wall or lands in the rack. It is finished when the run passes the right test, and that is the point where a lot of business owners get a surprise. The hidden labor is usually the part that keeps the help desk quiet and keeps a small office from chasing random ticket noise for months.
The first check on any serious job is a wiremap or continuity check. That catches opens, shorts, crossed pairs, and simple wiring mistakes before the patch panel is closed up. A higher-end qualification tester checks whether the installed line can handle the intended application, while a certification tester records whether the link meets the performance spec being sold.
| Cat6 Cable Testing Levels Compared | |||
|---|---|---|---|
| Tester Type | What It Checks | Typical Use | Business Value |
| Continuity / Wiremap Tester | Opens, shorts, pairing, wiring order | Basic install verification | Confirms the run is alive and wired correctly |
| Qualification Tester | Application readiness for the intended service | Network upgrades and active-path checks | Helps confirm the link will support the planned use |
| Certification Tester | Standards-based performance with saved results | Commercial installs and documented handoff | Gives proof the job was completed to spec |
That matters because 57% of new cabling installations fail certification on the first pass according to the installation data in the brief. The usual cause is poor termination, not bad cable. On a retrofit, that means time has to be set aside for rework, because a jack that looks fine from the ladder can still fail once the tester sees the wiring under load.
A proper test workflow should cover the basics every time:
- Continuity: Every conductor reaches the right pin.
- Correct Pairing: The right wire stays with its pair.
- Shorts: No two conductors are touching.
- Opens: Nothing is broken or loose.
- Wire Map: No split-pair mistakes from over-untwisting.
PoE needs its own check if phones or access points will draw power. A run can pass continuity and still fall over once a VoIP phone or AP loads the line. In older commercial buildings around Central Indiana, I also want the test report saved by drop, with labels that match the patch panel and wall jack, so the owner has a clean record and the next tech is not guessing. For a broader look at how these test results fit into a retrofit plan, see this network infrastructure upgrade guide for Indiana SMBs.
PoE, Future-Proofing, and the Real Cat6 vs Cat6A Question
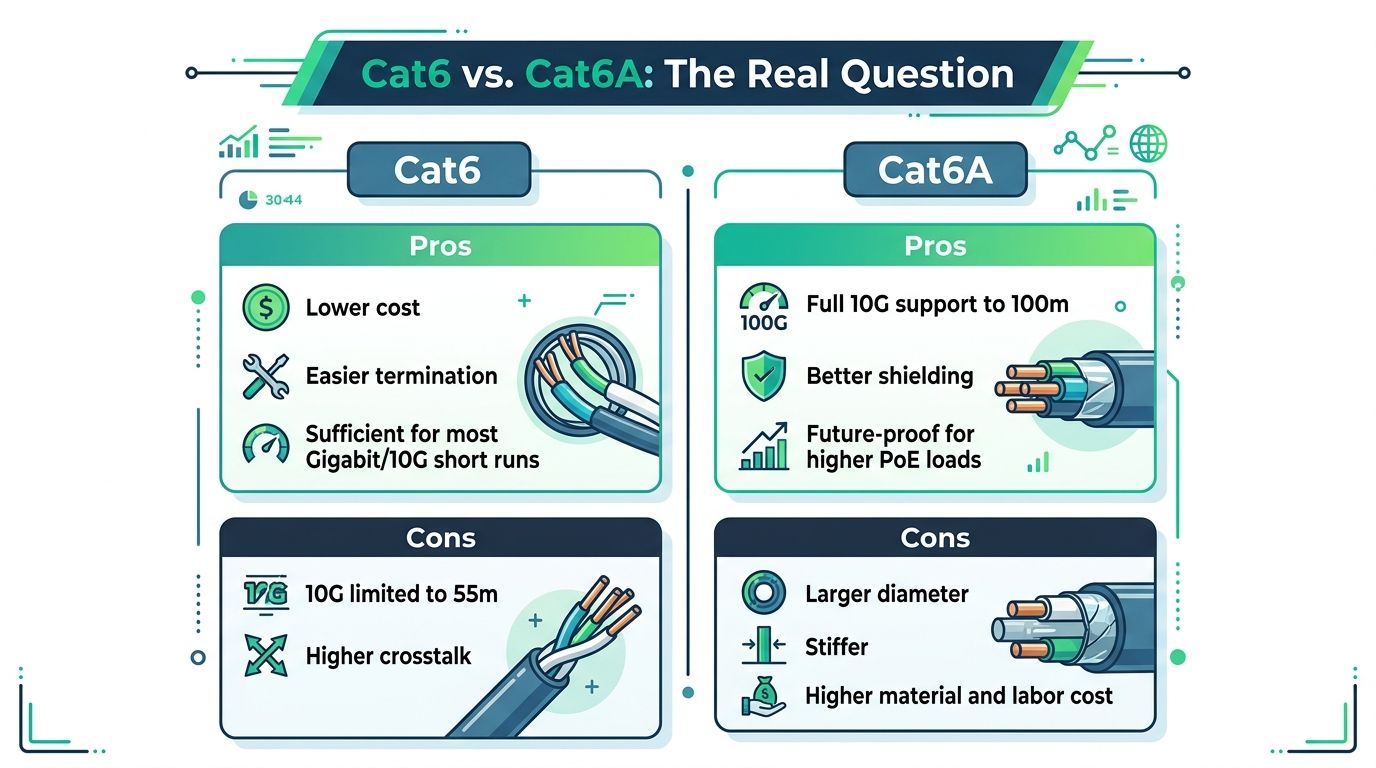
The wrong question is often asked. The question focuses on whether Cat6A is “better,” when the core issue is whether the extra size, stiffness, and labor make sense on a specific run. For a standard desk, printer, VoIP phone, or many access point drops, Cat6 is still the smarter spend.
Cat6A earns its place where the run is acting like infrastructure, not an outlet. That includes noisy pathways, rack uplinks, and links that need 10 Gb/s over the full 100-meter channel. Cat6 itself is standardized at 250 MHz, supports 1 Gbps up to 100 meters, and can support 10 Gbps up to 55 meters under standard conditions, which is why it stays the default for most business drops in the structured cabling data.
PoE changes the conversation
Power delivery adds heat and bundle stress. When a switch is pushing higher PoE loads through a tight bundle, the install needs more margin than a casual office spec sheet suggests. That's why Cat6A is often the cleaner call for denser, hotter, or harder-to-reopen paths, especially where future equipment may draw more power.
A practical way to decide is to ask three questions.
- Will the run need 10 Gb/s end to end?
- Will the bundle carry heavier powered devices?
- Will reopening the route later be expensive or disruptive?
If the answer to all three is no, Cat6 usually holds the line on cost and complexity. If the answer starts turning yes, Cat6A starts to earn its keep. That same judgment is why selective upgrades make more sense than blanketing every drop with the larger cable, especially in older Greenwood buildings where labor is already the hard part.
The Indiana network upgrade guide is worth a look when the cabling decision is tied to broader switching or Wi-Fi changes. The cable choice should fit the network plan, not the other way around.
Cost, Time, and When to Hand It to Finchum Fixes IT
A retrofit job usually gets expensive in the places owners do not see at first. The cable itself is only part of the bill. Access, pathway cleanup, termination, labeling, and testing usually drive the main labor, especially in older commercial buildings where ceiling space is tight and the route has to work around existing power, HVAC, and tenant buildouts. That is why a clean Cat6 plan starts with the route, not the reel.
DIY can make sense on a small, open job with a short run and no code complications. Once the path moves through a finished ceiling, a plenum, or any commercial route that has to stay compliant, the risk shifts from labor savings to downtime. A few hours lost to a bad route can slow phones, billing, and everyday operations more than the install itself ever would.
A two-person crew can usually terminate and test a fair number of drops in a day once the pathway is clear. The job slows down when the first pull finds hidden friction, when a supply-house run is needed for the wrong jack or plate, when drywall repair enters the picture, or when a test failure sends the crew back to rework a bad termination. That kind of delay is where owners start paying for interruptions instead of infrastructure.
Older Central Indiana buildings make that trade-off sharper. A route that looks simple on paper can turn into a ceiling access problem, a conduit issue, or a patch-and-paint job that adds time the quote did not cover. Those are the moments where planning matters more than hand speed.
If the cabling job also touches outlets, conduits, or panel changes, a commercial electrician may need to handle the power side, and how to hire a commercial electrician is a useful reference before you bring someone in.
Finchum Fixes IT makes sense when the goal is fewer interruptions, better documentation, and a network that is easier to support after the crew leaves. That matters for businesses that want cabling tied into managed networking, cybersecurity planning for HIPAA, CMMC, or NIST CSF environments, and support arrangements that replace wasted tech time with predictable monthly spend. In local service work, the pattern is familiar. The owner wants the phones up, the Wi-Fi steady, and the install finished in a way that does not turn into another invoice next quarter.
If your Greenwood or Indianapolis office needs a clean Cat6 plan, ask for a Free Network Assessment. It gives you a straight answer on route design, testing, and whether the retrofit should stay with Cat6 or move selected runs to Cat6A.